 USD ($)
 INR (₹)
 SAR (SAR)
 AED (AED)

Occasionally, when setting up a Windows VPS, the text might not look quite right—it could seem jagged or just generally unclear. This article aims to offer ways to tweak the appearance of your browser window to fix any font problems you might be encountering.
The instructions provided here focus on making adjustments in Windows 10, but the process should be quite similar across different versions of Windows. We often get this question from Hostwinds clients who are using Remote Desktop Protocol (RDP) and want to improve the clarity of their display.
Table of Contents
Text Looks Boxy Or Fuzzy
1. Access the Start Menu: First, click on the Start button or the Windows icon on your desktop.

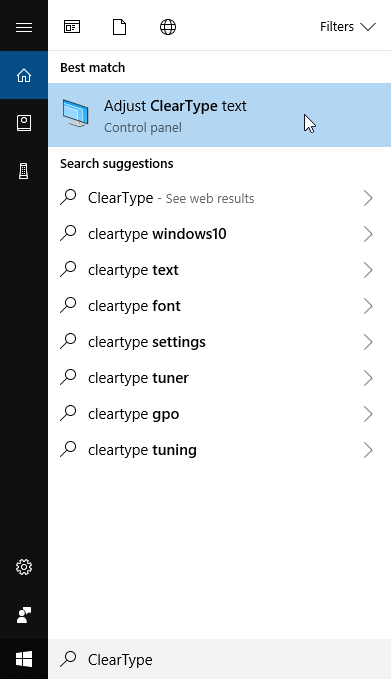
2. Find ClearType: Next, use the search feature in Windows—Windows 10 users can do this directly without clicking the Start icon. Type “ClearType” into the search bar. When you see ClearType show up in the search results, click on it to proceed.
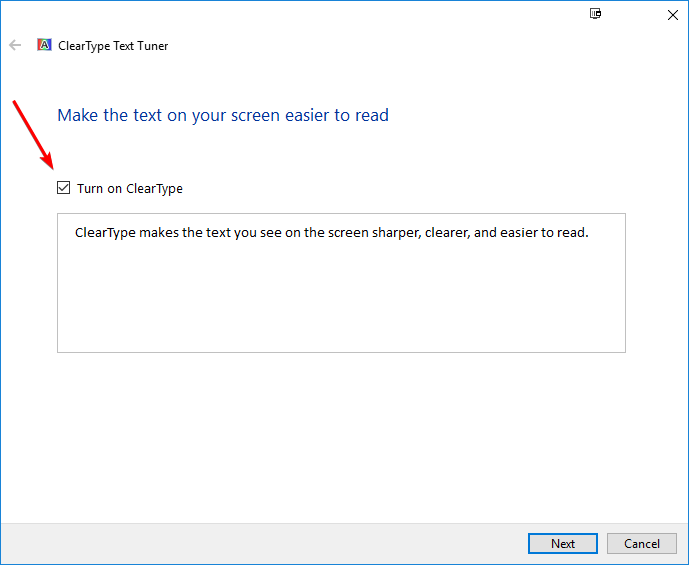
3. Enable ClearType: Make sure the option for “Turn on ClearType” is selected by checking its box. Then, click the “Next” button to move forward.
If you’re using multiple monitors, you’ll have the opportunity to adjust settings for each one. Choose to tune all your monitors and click “Next” to test and see which text settings look best to you.
4. Finalize Settings: After you’ve gone through the adjustments and are satisfied with how the text appears, click on “Finish” to apply your settings.
Adjust Your Windows Appearance
To adjust your display for potentially clearer text on a Windows VPS, follow these steps:
1. Open Start Menu: Click on the Start menu or the Windows icon located at the bottom left of your screen.

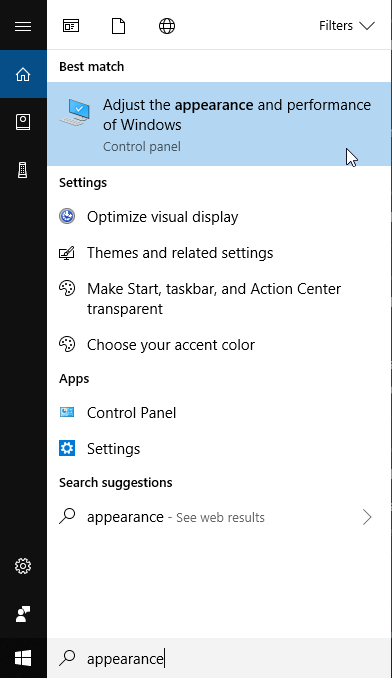
2. Search for Appearance Settings: Utilize the search feature in Windows 10, which can be accessed immediately without opening the Start menu. Type “Appearance” into the search bar. When the option “Adjust the appearance and performance of Windows” appears in the search results, click on it to proceed.
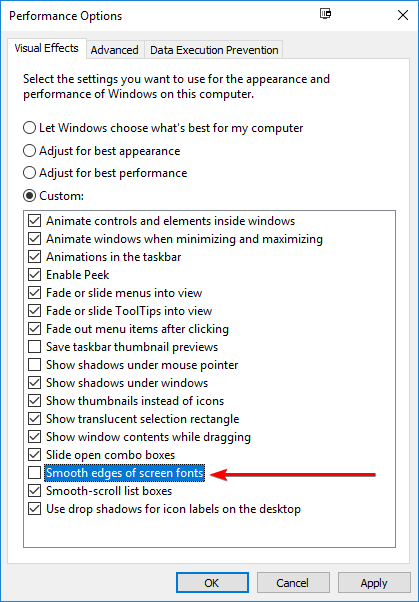
3. Adjust Font Smoothing: In the window that opens, look for the option “Smooth edges of screen fonts” and uncheck this box. This option controls how fonts are rendered on the screen. After unchecking, click “Apply” to save your changes.
4. Check the Changes: Finally, refresh your web browser or open it anew to see if there’s an improvement in text clarity.
Adjust Your Windows Display
To adjust your display settings for a clearer view, follow these steps:
1. Access Display Settings: Right-click on your desktop and choose “Display Settings” from the menu.
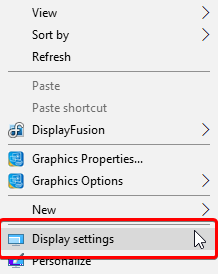
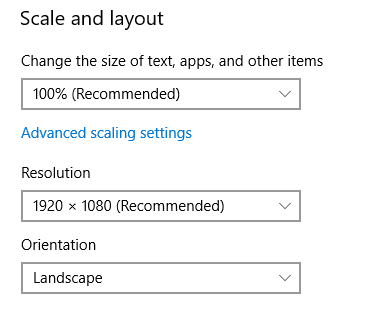
2. Adjust Text and Display: In the Display settings, make sure you’re on the “Display” tab. Look for the “Scale and layout” section where you can change the size of text, the screen resolution, and the orientation of your display. Experiment with these settings to see which combination offers the best visibility for your needs.
3. Confirm or Revert Changes: After making adjustments, you’ll be prompted to either keep the changes or revert them. If the new settings haven’t improved the situation or if things look worse, choose “Revert” to go back to your previous settings.

Remember, if you accidentally set the display in a way that’s hard to read or navigate, don’t worry. Your system should automatically ask you to confirm the changes. If you don’t respond, it will revert to the original settings after a short period, ensuring you’re not stuck with an unusable display.
Font Options If Using Chrome
To improve how text and content appear in your Chrome browser, you can adjust several settings related to appearance. Here’s how to do it:
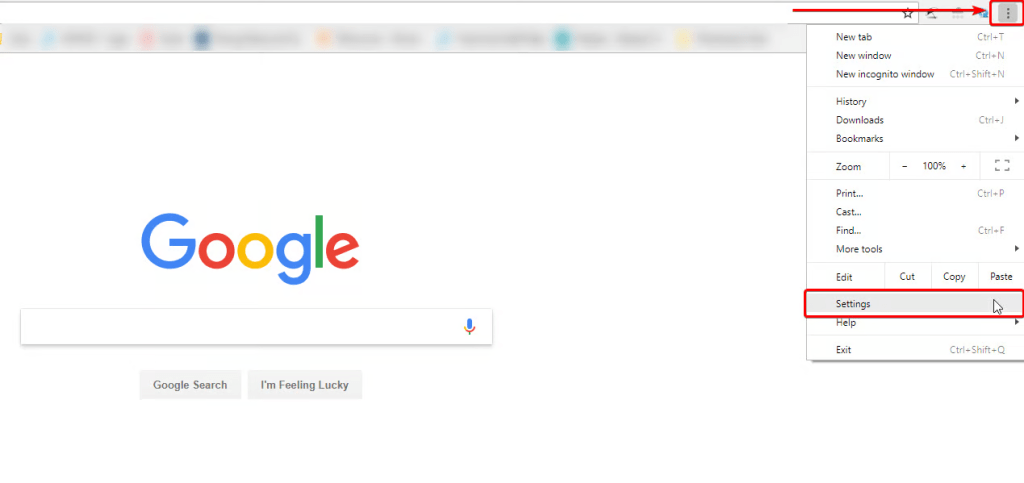
1. Open Settings in Chrome: Start by opening your Chrome browser. Click on the three dots in the top right corner to open the menu, then select “Settings” from the dropdown options.
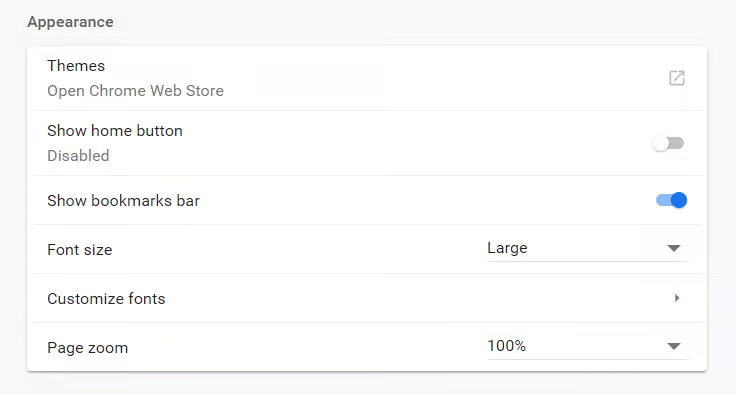
2. Adjust Appearance Settings: Within the Settings menu, navigate to the “Appearance” section. Here, you’ll find options to modify the Font Size, Customize Fonts, and adjust the Zoom level. Tweaking these settings can significantly enhance the readability and overall look of your browser. Feel free to experiment with different combinations to find what works best for you.
Font Options If Using Firefox
To adjust the appearance and improve the display settings within your Firefox browser, follow these straightforward steps:
1. Accessing Options: Open your Firefox browser and click on the Utilities Icon (three horizontal lines usually found in the top right corner). Look for “Options” in the drop-down menu and click on it to proceed.

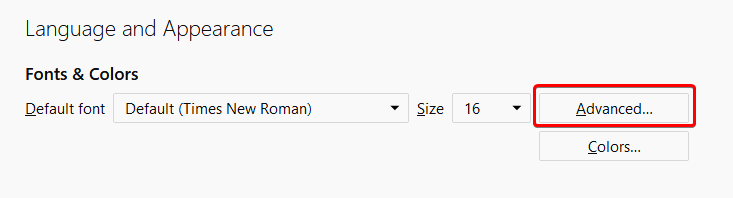
2. Adjusting Language and Appearance: In the Options menu, navigate to the “Language and Appearance” section. Here, you’ll find settings to change the default font and font size, which could help make text more readable according to your preference. If you’re looking for further customization, click on the “Advanced…” button for additional font and encoding options.
3. Fine-Tuning in Advanced Settings: Within the Advanced Settings, you have the opportunity to adjust the fonts for different types of content and choose specific sizes for each. Once you’ve made your adjustments, click “OK” to apply them. Refresh your browser to see the changes take effect.
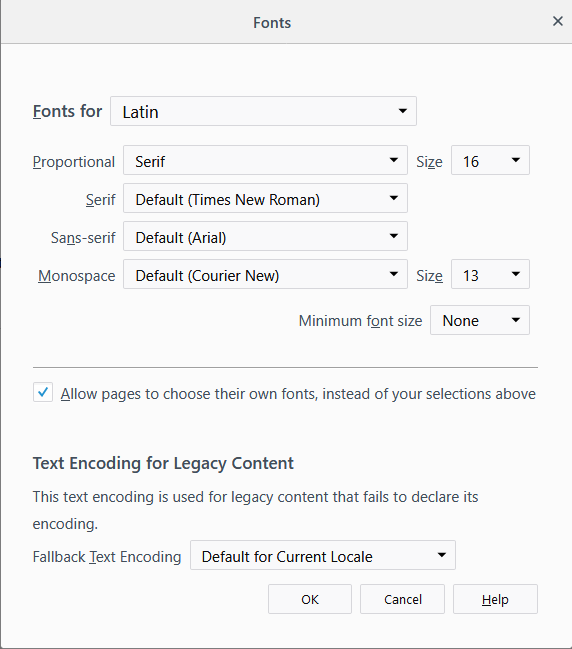
Should you decide you prefer the original settings, simply revert to the default option, usually “Times New Roman,” and your browser will return to its standard appearance settings.
Font Options If Using Explorer
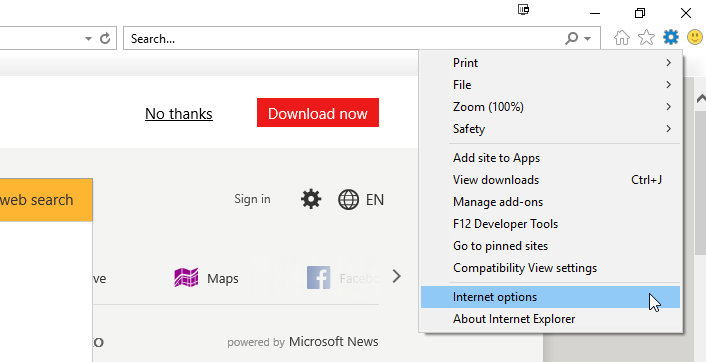
1. Opening Internet Options: Start by launching Internet Explorer. Look for the settings icon, which is usually represented by a gear icon in the top right corner of the window. Click on it, then from the dropdown menu, select “Internet Options” to open a dialog box where you can customize various settings.
2. Adjusting Appearance Settings: Once the Internet Options dialog box is open, go to the “General” tab, which is typically the first tab you’ll see. In this section, look for the “Appearance” subsection. Here, you’ll have the option to click on “Fonts” to change your font preferences, such as type and size, making text easier to read according to your liking. Additionally, you can select “Accessibility” to customize style sheets for a more personalized web browsing experience.

3. Applying Your Changes: After you’ve made your adjustments, simply click “OK” to confirm and apply your new settings. This action will close the dialog box and save your preferences.
Conclusion
Text display issues in Windows can stem from various factors, but by methodically going through the above steps, you can usually find a solution that restores clarity to your screen. Whether it’s tweaking display settings, updating drivers, adjusting application settings, or using Windows‘ built-in troubleshooting tools, you have many options to fix text display problems and enjoy a clearer, more readable screen.