 USD ($)
 INR (₹)
 SAR (SAR)
 AED (AED)

Welcome to this tutorial on how to create an email account in cPanel!
If you’re new to cPanel or just need a refresher on how to create an email account, you’re in the right place. Having an email account with your own domain name can help you establish a professional image for your business or personal brand. Plus, it’s easy to set up and use.
In this blog post, we’ll guide you through the step-by-step process of creating an email account in cPanel. Whether you’re using cPanel for the first time or you’re a seasoned pro, we’ve got you covered. So let’s get started!
What is cPanel?
cPanel is one of the most popular platforms that help you manage your web hosting server using a user-friendly web-based interface. For simplification of the web hosting process, it uses a graphical interface and automation tools. cPanel’s three-tier structure enables the administration through a standard web browser.
Today, no business can be imagined without emails. So, it is a must to have an email account. Below are the steps that will help you to create an email account in cPanel:
Steps to Create an Email Account in cPanel
Follow these steps to create an email account in cPanel:
Step 1:- Log into cPanel
The first step is to log into cPanel – log in using your existing username & password. If you are not an existing cPanel user, then you have to register first.
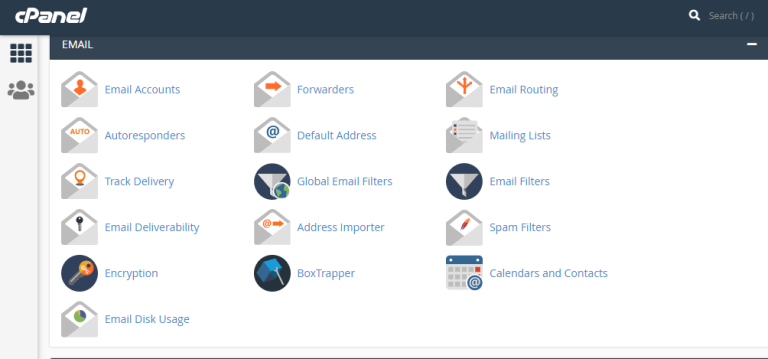
Step 2:- Email Account Creation
Click Email Account in the given email section in the tool menu on the homepage.
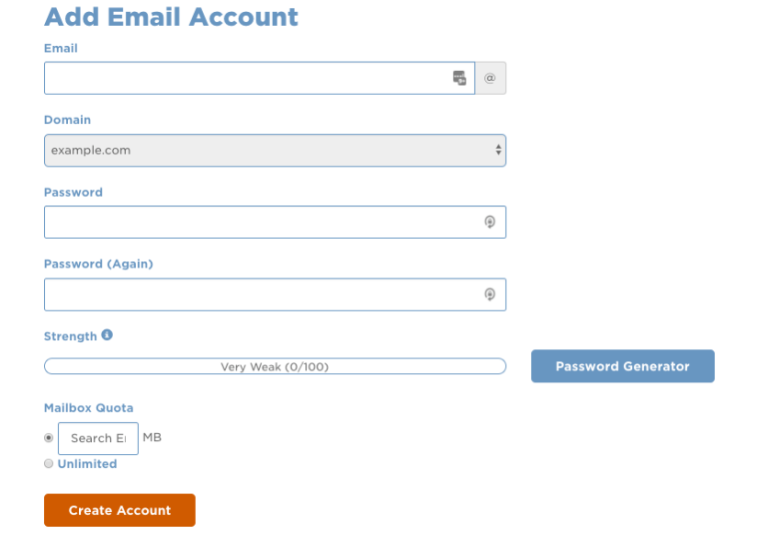
Step 3:– Fill up the Details
In the Email field, type your preferred username & select the domain name from the drop-down menu. You will find this in Adding an Account on the email account page.
Step 4:- Setting Up the Password
The fourth step is to create a password. Here you will get two options: set the password of your choice. Second, take help from the password generator (the password will be auto-generated & you will be asked to store it safely.). Select whichever option you like & set the password.
Step 5:- Select Mailbox Quota
You now will be asked to select your mailbox quota. Mailbox quota defines how much space your account can use. You can set a particular amount of your desired storage or choose an unlimited quota.
Step 6:- Email Account Creation Completion
At last, click Create Account to finish the process. Once done, your email account has been created on cPanel, and you will be notified about the same.
Afterthoughts
By following the steps outlined in this tutorial, you can easily create an email account in cPanel for your personal or business domain and start communicating with your clients and customers in a professional manner.
Remember, having a personalized email account not only helps you establish your brand identity, but it also ensures that your emails don’t get lost in the sea of spam that fills most inboxes. So, take advantage of the features cPanel has to offer and create as many email accounts as you need.